| Copying text from word to web page | Creating a table | using anchors | using hyper links |
| Handy hints | Audacity | Linking sound files | Switch WAV to MP3 |
1) Open the word document (double click on the icon)
Note on Windows use <control> or <ctrl> key and Apple Mac OSX use <apple> key.
2) Click in the body of the text
3) Hold down the <apple> key and hit "A". This will select ALL text in the file.
4) Hold down the <apple> key and hit "C". This will copy the text.
5) Close the word document.
6) Click on the dream weaver icon.
7) Select file -> select new -> choose blank html. (first time only)
8) Click onto the page, hold down the <apple> key and hit "V". This will paste the text into the web page.
9) Click the save key.
1) click the mouse on the spot where you want to insert the table
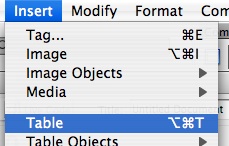
2) Select the Insert Menu and click on table
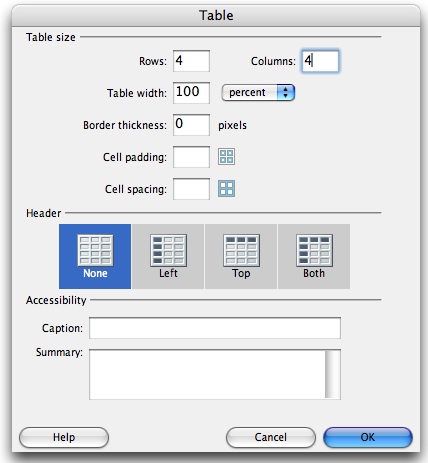
3) Next you need to specify how many rows and columns you want in the table, note you can alway add more later. If you want the table itself to be invisible set the border thickness to zero.
4) In dream weaver the table will look like this: (remember - in the browser the table will be invisible)

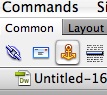
1) Click the mouse where you want to place the anchor, then click on the anchor button in the common menu.
2) Write the name of this anchor location in the dialog box which pops up on the screen.
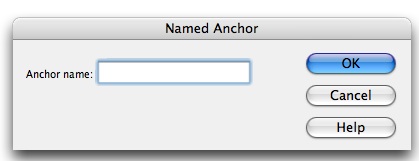
3) This name is not allowed to contain any spaces, only letters and numbers.
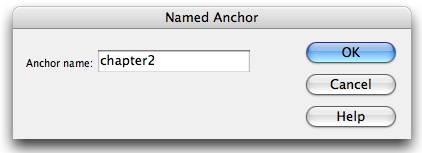
4) Then click OK
![]()
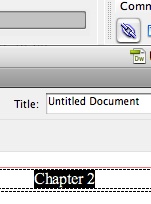
1) Go to the table at the top of the page and select the text you want to link to this anchor.
2) Click on the hyperlink button in the common menu (looks like a linked chain)
3) The following dialog box will appear. From the link menu select the anchor you wish the connect to.
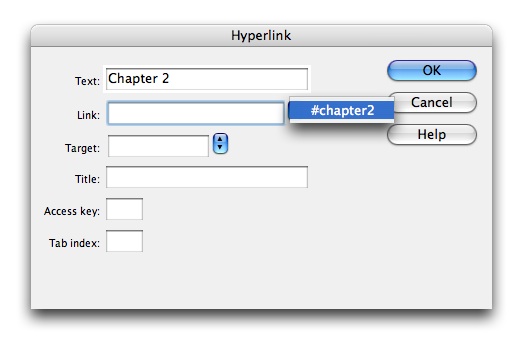
4) You do not need to specify anything else, unless you want to.
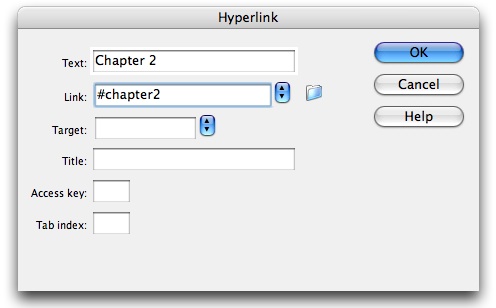
5) Click the OK button and your link is made.
![]()
1) click on the Audacity icon in the dock

2) select open file from the file menu, locate you audia file and open it.
3) the import can take quite a while, be patient, for example a 1 hour mp3 file will take 25 minutes to open.
4) select between 3 and 5 minutes of audio, then go to the file menu and select "Export Selection As WAV..." as shown below.
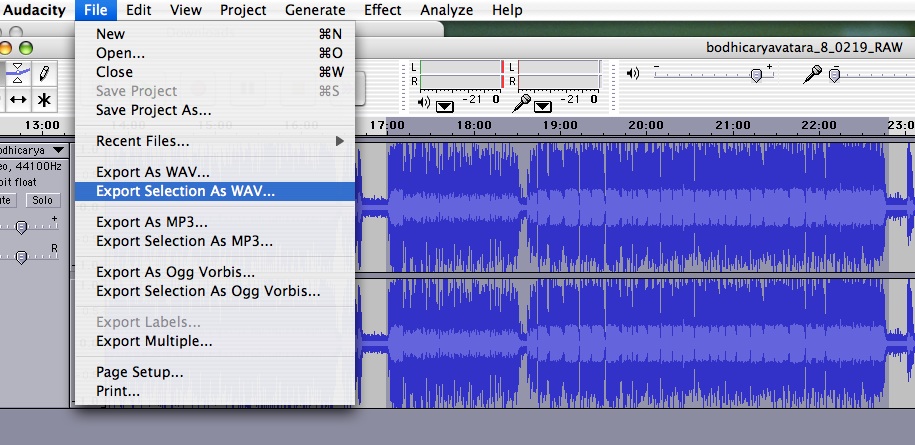
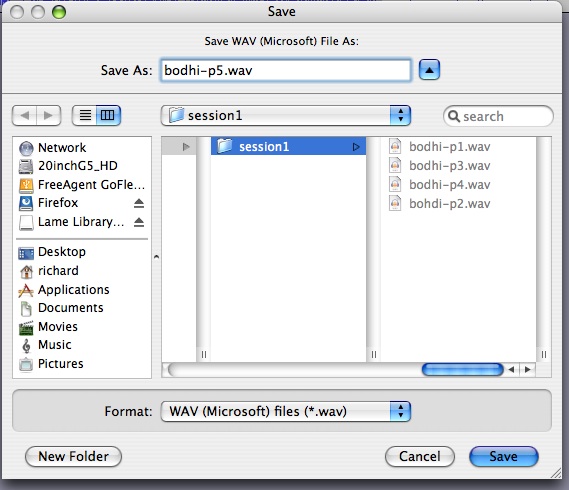
5) locate the folder you want to save to, rename your selection and then click on save.
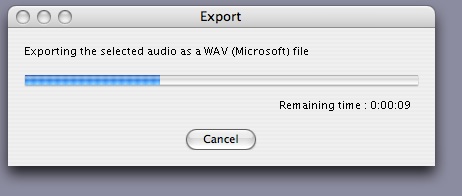
6) the following progress bar will appear, again be patient.
7) select the next section, click here.
1) Save the document you are working on first.
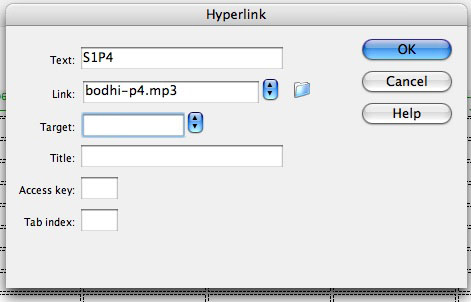
2) Select the text you want to make into a link.

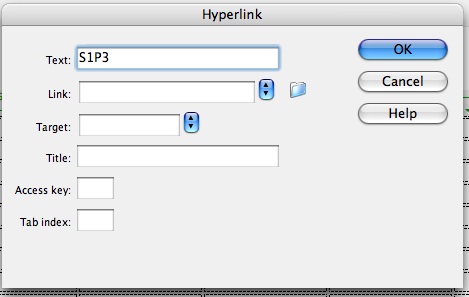
3) Click on the hyperlink incon in the common menu at the top of the screen.

4) the following dialog box will come up:
5) click on the folder icon.
![]()
6) navigate to and select the file you want to link to
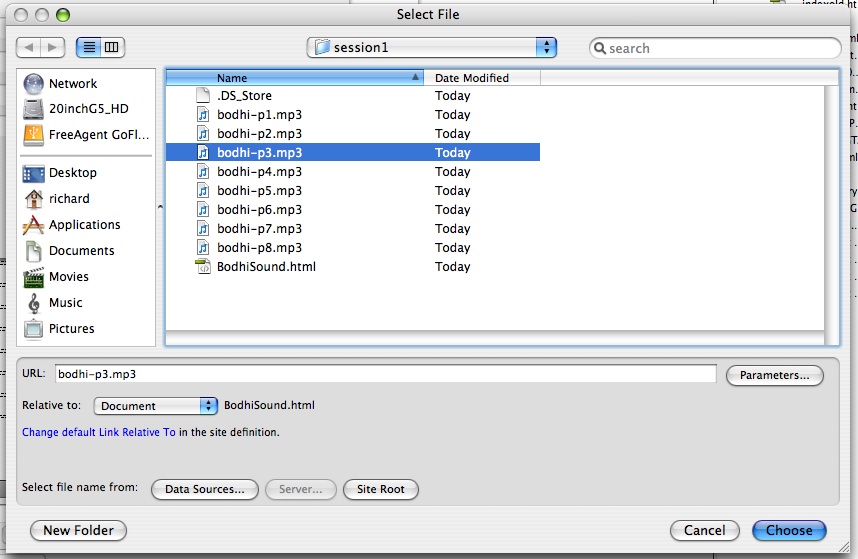
7) Either double click this file, or single click and then click on the choose button.
8) Click on the ok Button.
9) Now you are done. If you like you can select another bit of text and link it to another file. Remember to save the changes and to upload the file to the correct spot on the server.
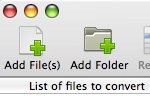
1) Load the Switch application by clicking on its icon in the doc

2) Click on either add files or folders icon, then locate the files you wish to convert.
3) Select the output folder location using the browse button:
![]()
4) Select the files, then click on the convert icon, and wait patiently while the files are converted to MP3.

5) click on open output folder icon to get to the converted files.
![]()
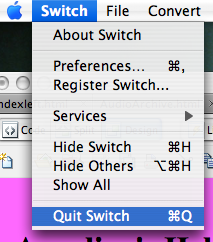
6) Do not forget the quit the switch program when you finish using it.
7) copy the converted files to the audioweb folder and prepare you webpage, before uploading it to the server.
1) On an Apple Macintosh you can take a screen shot by holding down the Apple and shift keys, then hitting 3, the screen capture will be automatically saved to the desktop name picture X, where X is a number starting with 1.
2) If you only want a screenshot of part of the screen, hold down the Apple and shift keys and hit 4, then use the mouse to select the area of the screen you want to capture. When you let go of the button the picture file will be saved to the desktop.
In both of these examples the computer will make a camera shutter sound to let you know that a photo of your screen has been taken.